- Empty cart.
- Continue Shopping

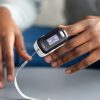
Managing diabetes requires careful monitoring of blood glucose levels, and a glucose meter is an essential tool for this task. Whether you have type 1, type 2, or gestational diabetes, knowing how to use a glucose meter correctly is crucial for effective diabetes management. In this guide, we will walk you through the steps to ensure accurate and reliable results.
Step 1: Gather Your Supplies
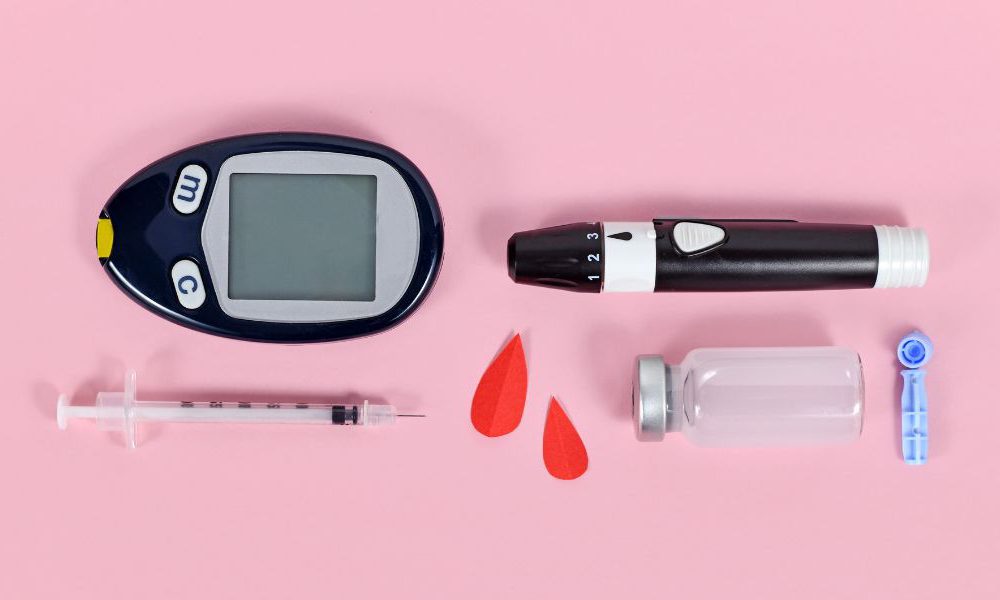
Before you begin, gather all the necessary supplies:
- Glucose meter: Ensure that your meter is clean and in good working condition.
- Test strips: Check the expiration date and make sure they are specific to your meter model.
- Lancet device: This is used to obtain a drop of blood for testing.
- Lancets: Ensure you have a new, sterile lancet.
- Alcohol swabs (optional): These are used to clean the testing area, but soap and water can also be used.
Step 2: Wash Your Hands
Clean hands are essential to prevent contamination of the blood sample and ensure accurate results. Wash your hands with warm, soapy water, and dry them thoroughly. Avoid using alcohol-based hand sanitizers as they may interfere with the glucose reading.
Step 3: Prepare the Lancet Device
Load a fresh lancet into the lancet device according to the manufacturer’s instructions. Adjust the depth setting if your device allows for it; a deeper setting may be necessary if you have thicker skin.
Step 4: Prepare the Glucose Meter
Insert a test strip into the glucose meter. Make sure the meter is turned on and ready for testing. Some meters require manual coding with a code found on the test strip container, so check your meter’s instructions to ensure proper coding.
Step 5: Prime the Lancet Device
Most lancet devices have a priming mechanism that prepares the lancet for use. Follow the manufacturer’s instructions to prime the device, which typically involves cocking the lancet mechanism.
Step 6: Select a Testing Site
The fingertip is the most common testing site because it provides reliable results. However, you can also use alternate sites like the palm, forearm, or thigh if recommended by your healthcare provider. Clean the chosen site with an alcohol swab or soap and water and allow it to dry completely.
Step 7: Obtain a Blood Sample
Hold the lancet device against the chosen testing site and press the release button to prick your skin. You should feel a slight pinch. Allow a small drop of blood to form at the site. Some meters require a larger blood sample than others, so consult your meter’s instructions for the specific volume required.
Step 8: Apply Blood to the Test Strip
Gently touch the end of the test strip to the blood drop. Ensure that the blood is drawn into the strip’s channel. Be cautious not to smear or wipe away the blood as this can affect the accuracy of the reading.
Step 9: Wait for the Reading
Most glucose meters provide a reading within a few seconds. The result will appear on the meter’s display screen. Some meters also offer features like automatic logging of results and averages over time.
Step 10: Record and Interpret the Result
Record the blood glucose reading in your diabetes logbook or on your smartphone if you’re using a diabetes management app. Pay attention to the time of day and any specific circumstances surrounding the test, such as before or after meals or exercise.
Interpreting your blood glucose readings is vital. Your target range may vary based on your type of diabetes and your healthcare provider’s recommendations. Typically, a target range for fasting blood sugar is between 80 to 130 mg/dL (4.4 to 7.2 mmol/L), while post-meal readings should ideally stay below 180 mg/dL (10.0 mmol/L).
Step 11: Dispose of Supplies Safely
Dispose of the lancet and test strip properly according to your local guidelines for medical waste disposal. Do not reuse lancets, as this can increase the risk of infection.
Tips for Accurate Readings
To ensure accurate glucose meter readings, consider these additional tips:
- Store your glucose meter and supplies in a cool, dry place, away from extreme temperatures and direct sunlight.
- Regularly check the expiration date on your test strips and replace them as needed.
- Keep your meter clean by wiping it with a damp cloth or an alcohol swab as necessary.
- Calibrate your meter as recommended by the manufacturer.
- If you suspect that your meter is not providing accurate readings, contact the manufacturer’s customer support or your healthcare provider for guidance.
In Conclusion, Using a glucose meter correctly is an essential skill for anyone managing diabetes. Regular monitoring of blood glucose levels empowers individuals to make informed decisions about diet, medication, and lifestyle to keep their diabetes under control. Always follow the instructions provided with your specific glucose meter, and consult your healthcare provider for guidance on target ranges and diabetes management strategies tailored to your unique needs. With proper technique and consistent monitoring, you can effectively manage your diabetes and lead a healthy, fulfilling life.