- Empty cart.
- Continue Shopping
How to Create a Vision Board for Health Goals

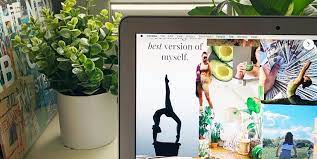
A vision board is a powerful visual tool that can help you stay motivated and focused on your health and wellness goals. It serves as a daily reminder of your aspirations, helping you manifest your dreams into reality.
1. Define Your Health Goals
Before you start creating your vision board, take some time to clarify your health and wellness goals. What do you want to achieve? Is it weight loss, improved fitness, better mental health, a balanced diet, or something else? Be specific about your objectives and the timeline you’d like to achieve them within.
2. Gather Supplies
Gather the necessary supplies to create your vision board:
- A poster board or corkboard: This will serve as the base for your vision board. Choose a size that allows you to display your goals effectively.
- Magazines or printed images: Look for images, words, and phrases that resonate with your health goals. These can be related to fitness, nutrition, mental health, or any aspect of wellness.
- Scissors: You’ll need scissors to cut out images and words from magazines.
- Glue or tape: Use glue sticks or double-sided tape to attach your chosen images and words to the board.
- Markers or colored pencils: These can be useful for adding your personal touch to the board, such as writing affirmations or drawing motivational symbols.
3. Create a Quiet Space
Find a quiet and comfortable space where you can work on your vision board without distractions. Consider playing calming music or lighting a candle to create a serene atmosphere.
4. Visualization
Before you begin cutting out images and words, take a few moments to visualize your health goals. Close your eyes and imagine yourself living a healthy and fulfilled life, achieving the goals you’ve set for yourself. Feel the emotions associated with your success.
5. Select and Cut Out Images and Words
Flip through magazines or print out images and words from the internet that align with your health goals. Look for inspirational quotes, pictures of healthy foods, fitness routines, serene nature scenes, or any other visuals that resonate with your vision.
6. Arrange and Attach
Begin arranging the images and words on your board. Experiment with different layouts until you find a visually appealing and motivating arrangement. Once you’re satisfied with the placement, use glue or tape to attach them to the board.
7. Personalize
Add a personal touch to your vision board. You can do this by including handwritten affirmations, quotes, or notes to yourself. Use markers or colored pencils to draw or write directly on the board.
8. Display Your Vision Board
Place your completed vision board in a location where you’ll see it daily. This might be in your bedroom, on your fridge, or in your home office. The key is to have it in a spot where it can serve as a constant reminder of your health goals.
9. Reflect and Visualize Daily
Take a few minutes each day to reflect on your vision board. Visualize yourself achieving your health goals and embodying the positive changes you aspire to make. Use this time for meditation or simply to reaffirm your commitment to your goals.
10. Update as Needed
As you progress toward your health goals and your aspirations evolve, feel free to update your vision board. Replace images or words that no longer resonate with you and add new ones that align with your current journey.
11. Stay Consistent and Patient
Creating a vision board is just the beginning. Staying consistent with your efforts and maintaining patience are crucial to achieving your health goals. Use your vision board as a source of inspiration and motivation, and remember that progress takes time.
A vision board can be a powerful tool to help you stay focused and motivated on your health and wellness journey. By regularly visualizing your goals and surrounding yourself with positive images and words, you can manifest the healthy and fulfilling life you desire.


